Special tasks
Operational runbooks for special integrations, server changes, telephony troubleshooting, WebRTC, clustering, provisioning, SMS, call recording, and maintenance tasks.
- Activating openaigateway
- Installing Amirouter
- Integrating with Microsoft Teams
- Debugging TLS problems
- Using the Generative Artificial Intelligence, talking with ChatGPT
- Activating the Switchboard
- Activating the transcript for calls
- Generating alternative smartadmin module
- Installing Certbot
- Flipping chan_sip/PJSIP default protocol
- Debugging extension state problems
- Activating FastAGI
- Installing FTP server for recordings
- Understanding call recording
- Configuring postfix for email relay
- TCP port Exhaustion
- Debugging bad calls
- Enabling WebRTC
- Configuring Bandwidth for inbound SMS
- Configuring Bandwidth as SMS Provider
- Configuring Flowroute for inbound SMS
- Configuring Flowroute as SMS/MMS Provider
- Using a node in the cluster to dial out from other nodes
- Integrating with Yealink Redirection and Provisioning Service (RPS)
- QueueMetrics integration
- Using PHP 7
- Upgrading Ioncube
- Upgrading CUPS to include ipp support
- Using haproxy
- Configuring OpenDNS
- Configuring BLF on Cisco SPA
- Using Cisco 7900/8800/9900 phones
- Phones local dial plan
- Text to Speech and Speech to Text services with IBM Bluemix
- Changing server name
- Changing server IP
- Choosing between Host Based Routing and SIP Registration
- Upgrading/Downgrading Asterisk
- Configuring BLF on a phone
- Running on VMware
- Upgrading kernel
- Using Parking Lots
- Clustering and High Availability
- Configuring Yealink to receive the number from the parked call
- Configuring Zoiper to use chat
- Changing the clock source
- Configuring Google Drive as Recording Storage
- Dealing with Amazon AWS DNS limits
Activating openaigateway
This page reorganizes the operational steps for Activating openaigateway.
To run OpenAIGateway you need python 3.12 installed. It can be installed only on CentOS 9
dnf install python3.12 python3.12-pip python3.12-devel
pip3.12 install poetry
pip3.12 install uvicorn
pip3.12 install "uvicorn[standard]"
pip3.12 install fastapi
pip3.12 install aiohttp
pip3.12 install aiomysql
The OpenAIGateway will be located in /usr/local/openaigateway and will run over port 9088
poetry run uvicorn src.main:app --host 0.0.0.0 --port 9088
On asterisk, you need to configure the websocket_client.conf
[openaibridge] ; The connection name
type = websocket_client ; Must be "websocket_client"
connection_type = per_call_config ; "persistent" or "per_call_config"
Default: none
uri = ws://127.0.0.1:9088 ; The URI needed to contact the remote server.
If you've enabled tls, use "wss" for the scheme.
Default: none
protocols = media ; The websocket protocol expected by the server.
Default: none
You need to configure /usr/local/openaigateway/.env with the MySQL details. If you are running the MySQL server on the default installation, just rename .env.sample in .env
Current Verification
After applying the change, verify the related MiRTA PBX page, the Asterisk logs, and the relevant Status menu entry. Recheck tenant selection before testing tenant-specific behavior.
Installing Amirouter
This page reorganizes the operational steps for Installing Amirouter.
Amirouter is the multimanager's replacement and the start for the next real-time switchboard. It is a java application and it is fully multithreaded. It is still in development, but it already fully usable
- Install JAVA
rpm -i https://devel.mirtapbx.com/mirtapbx_support/jdk-13.0.2_linux-x64_bin.rpm
- Check java version, it should be
java -versionjava version "13.0.2" 2020-01-14
Java(TM) SE Runtime Environment (build 13.0.2+8)
Java HotSpot(TM) 64-Bit Server VM (build 13.0.2+8, mixed mode, sharing)- Configure
/usr/local/amirouter/amirouter-server-config.yaml
/usr/local/amirouter/application.properties
- Start
/usr/local/bin/runamirouter.sh
Amirouter is creating a log file in /tmp/amirouter.out, usueful for debugging. It is a good idea to add a crontab entry to truncate it once a day:
0 0 * * * root truncate --size 0 /tmp/amirouter.out
If you need to compile Amirouter, but you should not need it
- Install MAVEN
cd /usr/local
wget the PBX web address
tar xzvf apache-maven-3.8.6-bin.tar.gz
export PATH=/usr/local/apache-maven-3.8.6/bin/:$PATH
cd -
- Get Amirouter from private git, compile and exec it with
\rm target/amirouter-* ; /usr/local/apache-maven-3.8.6/bin/mvn clean install spring-boot:repackage -DskipTests -Pamirouter && \cp target/amirouter-*-SNAPSHOT.jar /usr/local/amirouter/amirouter.jar ; killall -9 java ; runamirouter.sh
Current Verification
After applying the change, verify the related MiRTA PBX page, the Asterisk logs, and the relevant Status menu entry. Recheck tenant selection before testing tenant-specific behavior.
Integrating with Microsoft Teams
Microsoft Teams Direct Routing integration connects Microsoft Teams users to MiRTA PBX through OpenSIPS and an Asterisk PJSIP TLS transport. Treat this integration as an advanced deployment task: test it on one tenant and one Teams user before applying it broadly.
| Component | Role |
|---|---|
| Microsoft Teams | Hosts the Teams user, Direct Routing domain, SBC, voice route, PSTN usage record, and voice routing policy. |
| OpenSIPS | Listens for the Teams-side SIP/TLS connection and proxies it toward the Asterisk PJSIP listener. |
| Asterisk PJSIP | Terminates the PBX-side Teams trunk on a dedicated TLS transport, endpoint, AOR, and identify section. |
| MiRTA PBX | Stores the Teams integration settings, tenant Teams address, Microsoft Graph credentials, and custom extension authentication. |
Prerequisites
- Use a public DNS name for the Teams SBC. The certificate must include every Teams-facing domain used by the integration.
- Prepare public reachability for the Teams/OpenSIPS side and the dedicated Asterisk PJSIP TLS listener.
- Use a Microsoft tenant with the required Teams Phone and Microsoft 365 licensing for Direct Routing.
- Plan a dedicated Teams test user and a MiRTA PBX custom extension for the first validation.
- Keep a rollback path for OpenSIPS, Asterisk PJSIP, and MiRTA PBX tenant settings before changing production routing.
Microsoft Teams Configuration
Configure Microsoft Teams for Direct Routing before activating the PBX side. Microsoft admin menu names may change, but the required objects are the domain, SBC, PSTN usage record, voice route, routing policy, and user phone assignment.
- In the Microsoft 365 admin center, open Settings > Domains and add the SBC domain, for example
sbc.example.com. - Verify the domain. DNS TXT verification is commonly used: copy the verification value from Microsoft and publish it in public DNS.
- If this domain is used only for voice, leave Exchange-related services disabled during domain setup.
- Create or update the Teams user that will be tested with Direct Routing.
- Assign the required licenses, such as Teams Phone plus the appropriate Microsoft 365 plan.
- In the Microsoft Teams admin center, open Voice > Direct Routing.
- Create a PSTN usage record, for example
sbc. - Add the SBC. Enable it and enable SIP OPTIONS so Teams can monitor SBC availability.
- Create a voice route. Use a dialed-number pattern that matches the numbers you want to send to MiRTA PBX, for example
^(\+[0-9]{7,15})$for E.164 numbers. - Attach the SBC and the PSTN usage record to the voice route.
- Create a voice routing policy and add the PSTN usage record.
- Assign the voice routing policy to the Teams user.
- Assign a Direct Routing phone number to the user.
The SBC may show as inactive until OpenSIPS, certificates, and the Asterisk PJSIP transport are configured and reachable.
OpenSIPS Configuration
Install OpenSIPS on the node that will face Microsoft Teams. In the reference configuration, OpenSIPS listens on port 5067 and proxies traffic to the Asterisk PJSIP TLS listener on port 5091.
dnf config-manager --set-enabled crb
dnf -y install epel-release epel-next-release
dnf -y install https://yum.opensips.org/3.4/releases/st/9/x86_64/opensips-yum-releases-3.4-6.el9.noarch.rpm
yum -y install opensips opensips-* opensips-cli socat
systemctl enable opensips
Copy the prepared OpenSIPS configuration from the MiRTA PBX protected files to the OpenSIPS configuration directory:
cp /var/www/html/pbx/protected/opensips.cfg /etc/opensips/opensips.cfgAdjust the placeholders in the OpenSIPS configuration before starting the service.
| Placeholder | Meaning |
|---|---|
<IP-SERVER> |
Private or local IP address of the OpenSIPS virtual machine or node. |
<NAT-IP-SERVER> |
Public NAT address when NAT is used; otherwise use the same value as <IP-SERVER>. |
<IP-ASTERISK> |
IP address of the Asterisk server that receives proxied Teams traffic. |
<DOMAIN-ASTERISK> |
Fully qualified domain name used for the Asterisk/Teams side of the integration. |
After editing the configuration, enable and start OpenSIPS, then verify that it is listening on the expected port.
systemctl enable --now opensips
ss -lntp | grep 5091
ss -lntp | grep 5067
Asterisk Teams Configuration
Create a dedicated PJSIP TLS transport for Teams. Keep it separate from the normal PJSIP TLS transport used by phones. The example below uses port 5091 and a dedicated endpoint named msteams_trunk_from_teams.
[transporttls]
type=transport
protocol=tls
bind=0.0.0.0:5091
cert_file=/etc/opensips/ssl/cert.crt
ca_list_file=/etc/opensips/ssl/ca.crt
priv_key_file=/etc/opensips/ssl/privkey.crt
cipher=ECDHE-RSA-CHACHA20-POLY1305,ECDHE-RSA-AES256-GCM-SHA384,ECDHE-RSA-AES128-GCM-SHA256,ECDHE-RSA-AES256-SHA384,ECDHE-RSA-AES128-SHA256,AES256-GCM-SHA384,AES128-GCM-SHA256
method=sslv23
external_media_address=<PUBLIC-ASTERISK-IP>
external_signaling_address=<PUBLIC-ASTERISK-IP>

[msteams_trunk_from_teams]
type=endpoint
transport=transporttls
context=msteams
disallow=all
allow=ulaw
aors=aor_msteams_trunk_from_teams
media_encryption=sdes
from_domain=<ASTERISK-FQDN>
send_pai=no
rewrite_contact=no
force_rport=no
sdp_owner=-
sdp_session=FullysPBX
allow_transfer=yes
ice_support=no
direct_media=no
timers_sess_expires=3600
;session_timers=accepted
;session_expires=3600

[aor_msteams_trunk_from_teams]
type=aor
qualify_frequency=60
contact=sip:<OPENSIPS-FQDN>:5067

[msteams_trunk_from_teams]
type=identify
endpoint=msteams_trunk_from_teams
match=<PUBLIC-ASTERISK-IP>
Update sorcery.conf so realtime PJSIP objects and static configuration sections can coexist. This allows MiRTA PBX realtime objects to continue working while the Teams transport, AOR, and identify sections are read from static configuration.
[res_pjsip]
endpoint=realtime,ps_endpoints
endpoint=config,pjsip.conf,criteria=type=endpoint

auth=realtime,ps_auths

aor=realtime,ps_aors
aor=config,pjsip.conf,criteria=type=aor

domain_alias=realtime,ps_domain_aliases

contact=realtime,ps_contacts

[res_pjsip_endpoint_identifier_ip]
identify=realtime,ps_endpoint_id_ips
identify=config,pjsip.conf,criteria=type=identify

[res_pjsip_publish_asterisk]
asterisk-publication=realtime,ps_asterisk_publications

[res_pjsip_outbound_publish]
outbound-publish=realtime,ps_outbound_publishes

[res_pjsip_pubsub]
inbound-publication=realtime,ps_inbound_publications
Reload PJSIP only after the certificate files exist and the transport can bind to the configured port.
asterisk -rx "pjsip reload"
asterisk -rx "pjsip show transports"
asterisk -rx "pjsip show endpoint msteams_trunk_from_teams"
Certificate Generation
The certificate must include the public names used by the Teams SBC and related Asterisk/OpenSIPS domains. The following example writes the certificate files where the OpenSIPS and PJSIP examples expect them.
./acme.sh --issue --keylength 4096 --standalone \
  -d asterisk.example.com \
  -d opensips.example.com \
  -d teams1.example.com \
  --fullchain-file /etc/opensips/ssl/cert.crt \
  --cert-file /etc/opensips/ssl/ca.crt \
  --key-file /etc/opensips/ssl/privkey.crt \
  --server https://acme-v02.api.letsencrypt.org/directory
If acme.sh is not installed yet, install it first and then rerun the certificate request with the real contact email and domain names.
curl https://get.acme.sh | sh -s email=support@example.comMiRTA PBX Teams Configuration
In Admin > Settings, locate the MS Teams integration section. Enable the integration, set the OpenSIPS socket, and select or enter the server where OpenSIPS is running.
In Admin > Tenants, edit the tenant and set the Microsoft Teams address/name assigned to the Teams connection, for example sbc.example.com.
If Teams presence checks are required, also store the Microsoft tenant ID in the tenant configuration.
MiRTA PBX Teams Extension Configuration
MiRTA PBX connects a Teams user by using a custom extension. The custom extension represents the external Teams number while still participating in PBX routing and status logic.
- Create or edit the custom extension for the Teams user.
- Open the extension security section.
- Set the authentication type to Use Microsoft Teams.
- Set the authentication caller ID to the phone number assigned to the Teams user.
- Save the extension and test inbound and outbound calls with a single Teams user before repeating the configuration for others.
Presence and Status Integration
Teams does not expose extension state to MiRTA PBX in the same way as a SIP phone. MiRTA PBX can still check the Teams extension state before dialing a Teams extension, which helps avoid sending a PBX call to a Teams user who is already busy in Teams.
- In Admin > Tenants, fill the Microsoft tenant ID.
- In the custom extension, fill the Teams extension ID.
- In Configuration > Settings, fill the Microsoft client ID and client secret used for the status lookup.
- Open Status > Peers and verify that MiRTA PBX shows the state for the custom extension and the related Teams extension.
Debugging and Validation
OpenSIPS Listener
Confirm OpenSIPS is listening on the expected Teams/PBX ports.
ss -lntp | grep -E "5067|5091"
netstat -nap | grep 5091
Teams Connectivity
In the Teams admin center, check whether the SBC becomes active after OpenSIPS, certificates, and Asterisk PJSIP are running. Also confirm that Teams SIP OPTIONS are enabled for the SBC.
Asterisk PJSIP
Verify the Teams transport and endpoint from the Asterisk CLI.
asterisk -rx "pjsip show transports"
asterisk -rx "pjsip show endpoint msteams_trunk_from_teams"
asterisk -rx "pjsip show aor aor_msteams_trunk_from_teams"
Call Testing
- Place an outbound call from the Teams user through MiRTA PBX and check Asterisk logs for the
msteamscontext. - Place an inbound call from MiRTA PBX to the Teams custom extension and confirm caller ID and media.
- Review Status > Peers after configuring the Microsoft tenant ID, Teams extension ID, client ID, and client secret.
Operational Notes
- Keep the Teams PJSIP transport separate from phone transports to avoid changing phone registration behavior.
- Use descriptive DNS names for the Teams SBC and include all required names in the certificate.
- Validate Microsoft licensing and Direct Routing policy assignment before troubleshooting MiRTA PBX routing.
- If the SBC remains inactive in Teams, check DNS, certificate chain, SIP OPTIONS, OpenSIPS listener state, and Asterisk PJSIP transport binding.
Debugging TLS problems
This page reorganizes the operational steps for Debugging TLS problems.
There is a problem with CentOS 9 and TLS with Asterisk. These tools may help to identify the issue
List all the ciphers available
openssl ciphers -vCheck the ciphers available on a SSL server
openssl s_client -connect pbx.mirtapbx.com:5061 -cipher ALLor using nmap
nmap --script ssl-enum-ciphers -p 5061 pbx.mirtapbx.comCheck the protocols available on SSL server
testssl.sh pbx.mirtapbx.com:5081To check for the ciphers available on a client, dump the packets with tshark
tshark -i eth0 -w /var/www/html/tls.pcap -s 1500 -f 'host 176.206.10.252 and port 5061'And then process in wireshark using the ssl.handshake filter. Look for the Secure Socket Layer section
Enable LEGACY support
update-crypto-policies --set LEGACYCheck support level
update-crypto-policies --showIn pjsip.conf now you can use
method=tlsv1_2
cipher=DEFAULT,@SECLEVEL=1
Current Verification
After applying the change, verify the related MiRTA PBX page, the Asterisk logs, and the relevant Status menu entry. Recheck tenant selection before testing tenant-specific behavior.
Using the Generative Artificial Intelligence, talking with ChatGPT
This page reorganizes the operational steps for Using the Generative Artificial Intelligence, talking with ChatGPT.
To be able to talk with ChatGPT, you need three service subscriptions:
- A Google Speech to Text subscription using a Service Account
- A ChatGPT API Key with at least some credit
- A Google Text to Speech subscription using a API Key
For Google Speech to Text, you need to log into the Google console at https://console.cloud.google.com/ and create/select a Project.
In the APIs & Services page, enable the [ Cloud Speech-to-Text API ].
You need to create a Service Account. You can go back in the IAM & Admin page and select [ Service Accounts ] or using the [ Credentials ] section, create a Service Account. Be aware the service account authentication is a JSON file that the web page download automatically and once downloaded, it cannot be downloaded, so you need to carefully save it.
This is the page you are looking for when creating the service account.
thumb
For Google Text to Speech, you need to log into the Google console at https://console.cloud.google.com/ and create/select a Project.
In the APIs & Services page, enable the [ Cloud Speech-to-Text API ].
You need to create an API key. Access the Credentials for the [ APIs & Services ] and create an API key. You can restrict the IP allowed to use the service. An API key is something like AIzaSyAVA4f5Q53sxdeAFVESiL1AHdrBXt_q8gc
For ChatGPT API Key, you need to log into the ChatGPT platform at https://platform.openai.com/
Press the [ Start building ] button on the top right and create an Organization. Continue until you can generate the key and buy some credit.
You can review your credit from the project setting page at https://platform.openai.com/settings/organization/general by choosing Usage
AGI or AEAP
You can use the chatGPT integration in both ways, but the AEAP is the best way. AGI will soon be removed. To be able to use the AEAP you need to be sure to have asterisk configured to support this protocol. I am unsure about the oldest asterisk version using it, but it will be advisable to use latest Asterisk 20.x. To configure AEAP in asterisk, you need to create a /etc/asterisk/aeap.conf with the following content:
[my-speech-to-text]
type=client
codecs=!all,ulaw
url=ws://127.0.0.1:9099
protocol=speech_to_text
This will allow direct and very fast speech to text translation using Google Speech services
Functions
Functions are available using gpt-4-turbo and allow the AI to identify your request, ask the parameter and trigger the execution of the destinations. The parameter identified will be available as USR-parametername
Current Verification
After applying the change, verify the related MiRTA PBX page, the Asterisk logs, and the relevant Status menu entry. Recheck tenant selection before testing tenant-specific behavior.
Activating the Switchboard
This page reorganizes the operational steps for Activating the Switchboard.
The new switchboard is using the AMIRouter, so as first step, AMIRouter needs to be already configured. An additonal configuration in application.properties needs to be done
spring.datasource.database=asterisk
spring.datasource.url=jdbc:mysql://localhost:3306/asterisk?zeroDateTimeBehavior=convertToNull
spring.datasource.username=asterisk
spring.datasource.password=asterisk
spring.shell.command.quit.enabled=false
server.ssl.enabled=true
server.ssl.key-store=/usr/local/amirouter/certs/keystore.p12
server.ssl.key-store-password=tomcat
server.ssl.key-store-type=PKCS12
server.ssl.key-alias=tomcat
The keystore needs to be configured with a valid SSL certificate using the following command
cd /usr/local/amirouter
mkdir certs
cd certs
openssl pkcs12 -export -in fullchain.pem -inkey privkey.pem -out keystore.p12 -name tomcat
I suppose you noticed the keystore password is tomcat
You need to configure in Admin/Settings the URL the switchboard should connect to talk with the AMIRouter websocket part. You need to use something like pbx.yourdomain.com:8080 and activate the SSL
Activating the transcript for calls
This page reorganizes the operational steps for Activating the transcript for calls.
The following steps needs to be followed to activate the transcript for the calls:
- Choose your speech to text provider. You can select one in Admin/Settings or for each tenant in Configuration/Settings. If Google Speech to Text is used, you need to provide the JSON API key and the bucket name for intermediate storage of the recording to transcript
- The transcript is done in batch and you need to activate in Admin/Settings - Transcribe phone call recordings
- In the extension definition, activate the transcript of the call in the Outbound Recording section
- In the DID definition, activate the transcript of the call in the Voice section
It can be good to set the stereo recording to better separate the parties in the call
Current Verification
After applying the change, verify the related MiRTA PBX page, the Asterisk logs, and the relevant Status menu entry. Recheck tenant selection before testing tenant-specific behavior.
Generating alternative smartadmin module
This page reorganizes the operational steps for Generating alternative smartadmin module.
If you plan to apply substantial changes to the SmartAdmin theme module, it can be worth getting one developer license and compile your own smartadmin theme module. If not used to nodejs, npm and gulp, it can appear troublesome to compile all the data. Hidden in the SmartAdmin documentation there is a Youtube video https://www.youtube.com/watch?v=LwD-kYlZXtw but the relevant steps are the following:
Install nvm to be able to select the nodejs version of choice. The documentation states to use version 6.9.2, but that doesn't work, so I used version 10.16.0
curl -sL https://raw.githubusercontent.com/creationix/nvm/v0.35.3/install.sh -o install_nvm.sh
chmod a+x install_nvm.sh
./install_nvm.sh
Check the available versions
nvm -ls-remote
Install the version of your choice
nvm install 10.16.0
npm install express
Go in the smartadmin-html-full and run the commands:
npm install gulp
npm install
gulp build
gulp build-rtlcss
Depending on the system you may need to install gulp using:
npm install --global gulp-cli
If you just want to change the colors, the relevant change to apply is in ./src/scss/_modules/variables.scss
These are the colors used by default:
$color-primary: #2198F3;
$color-success: #52bf11;
$color-info: #BB1BF4;
$color-warning: #FF9A13;
$color-danger: #FC1349;
Don't forget to enable some "speedups" in build.json
"compile": {
"jsUglify": true,
"cssMinify": true,
"jsSourcemaps": true,
"cssSourcemaps": true,
"autoprefixer": true,
"seedOnly": false,
"rtl": false
},
Don't forget, if you are going to upgrade jquery-ui, to not include the tooltip module because it collides with the bootstrap one.
Current Verification
After applying the change, verify the related MiRTA PBX page, the Asterisk logs, and the relevant Status menu entry. Recheck tenant selection before testing tenant-specific behavior.
Installing Certbot
This page reorganizes the operational steps for Installing Certbot.
In short, to install Certbot on CentOS 7, run the following commands:
yum -y install snapd ; systemctl enable --now snapd.socket ; ln -s /var/lib/snapd/snap /snap
snap install core; snap refresh core ; snap install --classic certbot ; ln -s /snap/bin/certbot /usr/bin/certbot
If you want to use Certbot from within the Admin/Theme page, you need to follow the installation instruction about Apache Integration on related application page/Themes
Current Verification
After applying the change, verify the related MiRTA PBX page, the Asterisk logs, and the relevant Status menu entry. Recheck tenant selection before testing tenant-specific behavior.
Flipping chan_sip/PJSIP default protocol
This page reorganizes the operational steps for Flipping chan_sip/PJSIP default protocol.
You may want to use the PJSIP protocol as default protocol on port 5060 for your endpoints. You need to remember the server to server and the server internal calls must still be run over chan_sip protocol. These are the changes to apply:
in pjsip.conf change the port from 5080 to 5060, 5081 tp 5061 and so on, based on the protocols you are using
in sip.conf set the "bindport" to 5080 in the [general] section. Set the port parameter "port=5080" in the [pbx] sections
Restart asterisk
Current Verification
After applying the change, verify the related MiRTA PBX page, the Asterisk logs, and the relevant Status menu entry. Recheck tenant selection before testing tenant-specific behavior.
Debugging extension state problems
This page reorganizes the operational steps for Debugging extension state problems.
The extension state, "NOT INUSE" or "INUSE" is managed by a pair of daemons on each of your servers. Even when having just a single server, there are still two daemons. One (the related application page) is responsible of receiving events from asterisk, like call setup or call hnagup, the second one (the related application page) receives the data from the sender, performs some computation and updates the Custom device states in Asterisk.
When there are problems with these softwares, regardless of the origin, you can experience an extension being in "INUSE" state while no one is on the phone, or having an extension in "NOT INUSE" state while is instead on the phone, so maybe receiving multiple calls at once.
If you have detecting problems, the best is to enable the collection of extensions events in Admin/Settings (Log Extension Events) and the enable logging (Device state logging). Once these settings are enabled, it is advisable to kill both the related application page and the related application page letting them to be restarted automatically.
In short, the related application page receives the events from asterisk and communicates the change to the related application page over port 19771. the related application page will update the database, table st_states and the Custom device state. Asterisk will use the Custom device state to update the Queue Member status.
When a problem arises, it is important to check where this process has failed.
Let's make an example. A client is calling saying he is not receiving calls on his phone, for example 100-DEVEL. You'll check the status, and find the phone in "INUSE" state while the client is not on call.
It is important to get all the info to be able to debug the issue, so take a note about the "server time" it is happening with "minute and second" precision and to get any useful info from the client about what kind of call has received or made in the time preceding the problem.
It can be useful to get the data of all three places where the status of the extension is stored and used. Let's make an example, the extension being reported "stuck" is 100-DEVEL, then in the database, get the status with
select * from st_states where st_extension='100-DEVEL'
Get the status of the custom device state
asterisk -rx 'devstate list' | grep 100-DEVEL
Get the status of the Queue member, if any
asterisk -rx 'queue show' | grep 100-DEVEL
Current Verification
After applying the change, verify the related MiRTA PBX page, the Asterisk logs, and the relevant Status menu entry. Recheck tenant selection before testing tenant-specific behavior.
Activating FastAGI
This page reorganizes the operational steps for Activating FastAGI.
With very busy servers, it can help to offload the AGI scripts to another server or process. The load is reduced because there is no need to spawn a process every time a new AGI script is run.
install node
On CentOS 6/7
curl -sL https://rpm.nodesource.com/setup_14.x | sudo bash -
sudo yum install -y nodejs
npm install -g npm
On CentOS 9
curl -fsSL https://rpm.nodesource.com/setup_20.x | sudo bash -
yum install nodejs -y
npm install -g npm
install pm2
sudo npm i -g pm2Copy the whole node folder
<del>https://git.freepbx.org/projects/FREEPBX/repos/core/browse/node</del>
the PBX web address
to /var/lib/asterisk/agi-bin directory
run pm2 at start up
pm2 startup
pm2 install pm2-logrotate
start fast agi script with pm2
pm2 start /var/lib/asterisk/agi-bin/node/fastagi-server.js
pm2 save
pm2 list
pm2 update
fastagi-server.js (--watch) don't use watch it reloads for all files in the path
centos 6
cd ~
wget http://nodejs.org/dist/v10.15.1/node-v10.15.1-linux-x64.tar.gz # (Must check the latest version change the version name accordingly)
sudo tar --strip-components 1 -xzvf node-v10.15.1-linux-x64.tar.gz -C /usr/local # (Must check the latest version change the version name accordingly)
Verify by using: node --version
npm i -g pm2
Final setting
On the MiRTA PBX side, you can edit the extensions.ael and uncomment the row at top, in globals section (but this change will be overwritten at every upgrade) or add a file in /etc/asterisk/extensions.d named for example fastagi.ael and containing:
globals {
FASTAGI=agi://127.0.0.1/;
};
You need to reload AEL only the first time
Patching fastagi
It seems there is a bug in the current fastagi-server.js. It tries to split the parameters with the ":", but that is breaking the date when uploading the recordings.
Replace the line:
let s = line.split(":").map((item) => {
With
let s = line.split(": ").map((item) => {
Once patched, you need to run
pm2 reload fastagi-server
Current Verification
After applying the change, verify the related MiRTA PBX page, the Asterisk logs, and the relevant Status menu entry. Recheck tenant selection before testing tenant-specific behavior.
Installing FTP server for recordings
This page reorganizes the operational steps for Installing FTP server for recordings.
My preferred ftp server is vsftpd, it is easy to configure and quite stable
yum -y install vsftpd
chkconfig --level 2345 vsftpd on
You may prefer to use a SSL connection to access the FTP so you need to perform the following:
mkdir /etc/ssl/private
openssl req -x509 -nodes -days 365 -newkey rsa:1024 -keyout /etc/ssl/private/vsftpd.pem -out /etc/ssl/private/vsftpd.pem
Edit the /etc/vsftpd/vsftpd.conf and change:
anonymous_enable=NO
chroot_local_user=YES
add at the bottom:
ssl_enable=YES
allow_anon_ssl=NO
force_local_data_ssl=YES
force_local_logins_ssl=YES
ssl_tlsv1=YES
ssl_sslv2=NO
ssl_sslv3=NO
rsa_cert_file=/etc/ssl/private/vsftpd.pem
rsa_private_key_file=/etc/ssl/private/vsftpd.pem
require_ssl_reuse=no
Create an user, like recording and set a password
To be able to use chroot, the /home/recording must be not writable, so you need to set
chmod 500 /home/recording
And create a directory inside
mkdir /home/recording/recordings
chown recording:recording /home/recording/recordings
Current Verification
After applying the change, verify the related MiRTA PBX page, the Asterisk logs, and the relevant Status menu entry. Recheck tenant selection before testing tenant-specific behavior.
Understanding call recording
This page reorganizes the operational steps for Understanding call recording.
Call recording is a hot topic and while it is quite simple to perform the recording at trunk level, it is very hard to manage start, stopping and transfer of calls while recording. Let's show some scenario and detail what works and what doesn't work.
Phone A is configured with recording "Yes, but allow to stop by caller"
Phone B is configured with recording "Yes, but allow to stop by caller"
DID is configure with recording "Yes, but allow to stop by called"
| Type of Call | Description | Result |
|---|---|---|
| Direct call | Phone A calls Phone B | The call is recorded |
| Transferred call | Phone A calls Phone B, Phone A transfers the call to Phone C | The call from A to B is recorded. The call between B and C is not recorded |
| Transferred call | Phone A calls Phone B, Phone B transfers the call to Phone C | The call from A to B is recorded. The call between A and C is recorded |
| Inbound call | External Phone calls Phone A | The call from External Phone and A |
| Inbound Transferred call | External Phone calls Phone A, Phone A transfer the call to Phone B | The call from External Phone and A is recorded. The call between External Phone and B is recorded |
Current Verification
After applying the change, verify the related MiRTA PBX page, the Asterisk logs, and the relevant Status menu entry. Recheck tenant selection before testing tenant-specific behavior.
Configuring postfix for email relay
This page reorganizes the operational steps for Configuring postfix for email relay.
Install any prerequisite
yum install postfix cyrus-sasl cyrus-sasl-gssapi cyrus-sasl-plainIn main.cf add the following:
relayhost = <your relay host>:587
smtp_use_tls = yes
smtp_sasl_password_maps = hash:/etc/postfix/sasl_passwd
smtp_sasl_auth_enable = yes
smtp_sasl_security_options =
in sasl_passwd
<your relay host>:587 username:passwordDon't forget to postmap the sasl_passwd
Current Verification
After applying the change, verify the related MiRTA PBX page, the Asterisk logs, and the relevant Status menu entry. Recheck tenant selection before testing tenant-specific behavior.
TCP port Exhaustion
This page reorganizes the operational steps for TCP port Exhaustion.
While running several Wallboards, maybe connected to several queues, it is not uncommon to see a shortage of ephemeral ports. You can count how many ports you are using with AMI with the following command:
netstat -an | grep TIME_WAIT | grep -c :5038Common solutions would be to lower your TCP timers and turn on tcp_reuse. In your sysctl.conf file, add:
net.ipv4.tcp_fin_timeout=1
net.ipv4.tcp_tw_reuse=1
Current Verification
After applying the change, verify the related MiRTA PBX page, the Asterisk logs, and the relevant Status menu entry. Recheck tenant selection before testing tenant-specific behavior.
Debugging bad calls
This page reorganizes the operational steps for Debugging bad calls.
It is possible one or more of your clients have a real bad voice quality. Finding the problem can be not easy, but it is mandatory to go through some steps to try to identify the source of the problem. The source for bad voice quality, in short, can be:
1) Server overloaded - the server cannot handle the load
2) Server Internet pipe saturated
3) Client Internet pipe saturated
4) Provider Internet pipe saturated
To include or exclude some of these possible problem sources, you can perform some actions:
- Check the server load using "top". It can be difficult to identify some random spike in load, but monitoring for a long time can give you an idea of your server health. The load on the server should be never higher than the number of cores. If the problem affects only a few tenants, then it cannot be a general server overload.
- Ask the client to call from an internal phone to another internal phone. In this case, you are testing both client upload/download network performance. If the quality is bad, then it can be the client network.
- Create a feature code to play a music file and ask the client to dial that feature code and listen to the music. In this case, you are testing only the "download" part of the client network.
- Place a media file as DID destination and call from your mobile phone. If the quality is bad, it can be the server or the provider network congested. Try selecting a DID from different providers to understand if it is your provider or your server network to have problems. Be aware, different providers can use the same connection.
| Test / Cause | Server Overloaded | Server Internet pipe saturated | Client Internet pipe saturated | Provider Internet pipe saturated |
|---|---|---|---|---|
| All or multiple tenants report the problem | Possible | Possible | Unlikely | Possible |
| Only one tenant reports the problem | Unlikely | Unlikely | Possible | Unlikely |
| Internal to Internal calls are bad | Unlikely | Possible | Possible | Possible |
| Internal to Internal calls are good | No | No | No | Possible |
| Mediafile play using a feature code is bad | Possible | Possible | Possible | Unlikely |
| Mediafile play using a feature code is good | No | No | No | Possible |
| Calling a DID from a mobile phone is bad | Possible | Unlikely | Unlikely | Possible |
| Calling a DID from a mobile phone is good | No | No | Possible | No |
Current Verification
After applying the change, verify the related MiRTA PBX page, the Asterisk logs, and the relevant Status menu entry. Recheck tenant selection before testing tenant-specific behavior.
Enabling WebRTC
This page reorganizes the operational steps for Enabling WebRTC.
WebRTC is not enabled by default and you need to follow carefully the following steps to make it work.
- Install an SSL certificate on Asterisk. This needs to be a real SSL certificate. Check the Asterisk FAQ on how to install an SSL Certificate in Asterisk
- Install the Opus codec and add to the web interface. You can check the instructions in the Setup Guides section Installing OPUS codec
- Activate the http daemon for asterisk by editing the http.conf file as following:
[general]
enabled=yes
bindaddr=0.0.0.0
bindport=8088
tlsenable=yes
tlsbindaddr=0.0.0.0:8089
tlscertfile=/etc/asterisk/certificates/demo.mirtapbx.com.pem
The tlscertfile needs to point to your certificate in pem format
You can provide separate cert and key:
tlscertfile=/etc/ssl/demo.mirtapbx.com.crt
tlsprivatekey=/etc/ssl/demo.mirtapbx.com.key
It may be needed to set the following parameters in sip.conf too:
dtlsenable=yes
dtlsverify=fingerprint
dtlscertfile=
dtlsprivatekey=- Activate the ws and wss transport in sip.conf, set the realm
transport=udp,tcp,tls,ws,wss
realm=demo.mirtapbx.com- Set the path for your certificate in the Web interface - Admin/Settings, Security section, WebRTC SSL path field
- In your extension enable Opus Codec, WebRTC support, RTP Encryption and Any Transport
Verifying WebRTC
To verify the WebRTC configuration, you can try to register and place calls using the SipML5 by visiting: https://www.doubango.org/sipml5/
400px
Current Verification
After applying the change, verify the related MiRTA PBX page, the Asterisk logs, and the relevant Status menu entry. Recheck tenant selection before testing tenant-specific behavior.
Configuring Bandwidth for inbound SMS
This page reorganizes the operational steps for Configuring Bandwidth for inbound SMS.
Unfortunately, Bandwidth is not allowing me access to their platform to test and further develop any integration with their API due to I am not hosting any of their traffic (I am not a telecommunication company). I think the sales representative I talked too and refuse to grant me an account, even paying, has not understood it was for mutually beneficial. If you are using Bandwidth service, I invite you to contact your sales representative and express your concern about their position. This documentation will be no more maintained and it will be removed soon unless I get access to their services. Yes, I can use your account, but it will be not fair to work around their policy.
Inbound SMS can be received using several protocols. The easiest one to configure is the HTTP method. Using this method, the selected provider will perform an HTTP request to the PBX server and deliver the message. On the provider part, the URL to configure is your PBX web interface to web page the related application page
As example, let's configure the service on Bandwidth.com provider. In the Applications page you are going to create an application name, like for example "PBX" with callback method "GET" and the URL https://www.yourwebinterface.com/pbx/the related application page
400px
Still in Bandwidth web interface, you need to assign the "PBX" application to each of the numbers you want to receive SMS with.
400px
Now it is the turn to configure the DID in your PBX to correctly process the request from Bandwidth. In the DID section you'll choose the HTTP GET/POST protocol and the name of the fields used by Bandwidth to deliver the message:
400px
Bandwidth has upgraded its API to v2 and changed the way the SMS is delivered. So if you are using this kind of protocol, the configuration is different:
400px
Bandwidth allows to receive SMS with multiple destinations, so you can see who else has been messaged with you. If you want to get them, you need to replace the "to" field with "0[message][to][${n:0:10}]" and you can get the list of the destinations in the ${SMSALLDESTS} variable
Current Verification
After applying the change, verify the related MiRTA PBX page, the Asterisk logs, and the relevant Status menu entry. Recheck tenant selection before testing tenant-specific behavior.
Configuring Bandwidth as SMS Provider
Unfortunately, Bandwidth is not allowing me access to their platform to test and further develop any integration with their API due to I am not hosting any of their traffic (I am not a telecommunication company). I think the sales representative I talked too and refuse to grant me an account, even paying, has not understood it was for mutually beneficial. If you are using Bandwidth service, I invite you to contact your sales representative and express your concern about their position. This documentation will be no more maintained and it will be removed soon unless I get access to their services. Yes, I can use your account, but it will be not fair to work around their policy.
Bandwidth provider uses JSON data to process the SMS requests.
You need to create a new provider, type SMS and use the following configuration.

SMS URL: https://api.catapult.inetwork.com/v2/users/<YOUR ID>/messages

from:${SMSSOURCENUM}
to:${SMSDESTNUM}
text:${SMSTEXT}
applicationId:<YOUR APPLICATION ID>
Replace <YOUR APPLICATION ID> with the application id shown on your Bandwidth configuration page
Once you have the provider configured, you can create an SMS Routing Profile and then assign it to your tenant
If you want to send MMS, you need to add another piece of code:
from:${SMSSOURCENUM}
to:${SMSDESTNUM}
text:${SMSTEXT}
applicationId:<YOUR APPLICATION ID>
{mms}media: http://<YOUR WEBSITE>/pbx/mms/${MMSKEY}/${MMSFILENAME}{/mms}
Configuring Flowroute for inbound SMS
This special task page covers Configuring Flowroute for inbound SMS. Use it as an operational checklist and adjust the exact commands or values to the node, tenant, provider, and Asterisk version in use.
Before Starting
- Confirm the tenant or node scope.
- Take a configuration backup when changing system files.
- Schedule service-impacting changes during a maintenance window.
Implementation Checklist
- Review the current MiRTA PBX settings and related Asterisk configuration.
- Apply the change to a test tenant or a single node first.
- Reload or restart only the required services.
- Validate calls, registrations, logs, and status pages.
Configuring Flowroute as SMS/MMS Provider
This page reorganizes the operational steps for Configuring Flowroute as SMS/MMS Provider.
Flowroute allows to use both SMS and MMS. You can configure the provider as following:
400px
Current Verification
After applying the change, verify the related MiRTA PBX page, the Asterisk logs, and the relevant Status menu entry. Recheck tenant selection before testing tenant-specific behavior.
Using a node in the cluster to dial out from other nodes
This page reorganizes the operational steps for Using a node in the cluster to dial out from other nodes.
This configuration requires a more than average knowledge of Asterisk dialplan and SIP configuration.
In general, you cannot use one node as "Provider" for other nodes. Calls between nodes are managed as "internal" calls and the call will fail. However, there can be the need to send out special calls from one node only. Let's make the example of a node in the cluster hosting a Dahdi interface. To allow all other nodes to use the Dahdi interface to dial out special numbers, a special configuration needs to be done.
First you need to remove from sip.conf the parameter "insecure=port,invite" from all the host accounts. This parameter authenticate nodes using IP Address and it is used as a fallback when for some reason the user/password authentication doesn't work, for example due to a server name change not applied to sip.conf.
400px
Then you need to create a new account, in sip.conf for the communications between the other servers in the cluster and the node hosting the Dahdi interface
400px
On the Provider page, add the provider for this account
400px
As you have seen, the new account/provider is mapped to the context [dahdi]. Create that context and dial the Dahdi interface:
400px
Current Verification
After applying the change, verify the related MiRTA PBX page, the Asterisk logs, and the relevant Status menu entry. Recheck tenant selection before testing tenant-specific behavior.
Integrating with Yealink Redirection and Provisioning Service (RPS)
This page reorganizes the operational steps for Integrating with Yealink Redirection and Provisioning Service (RPS).
A nice client of me as written a nice guide to have Yealking RPS service integrated with Phone provisioning, so when you create or update your phone entry in Configuration/Provisioning/Phone, your RPS entry will be created or updated.
Log in your RPS account at https://dm.yealink.com/manager/login
After logging in click "Server Management" on the left sidebar and click "Add Server" at the top
400px
Give your server a friendly name and add the provisioning URL and Save. You will pass the Server Name in the Remote provisioning POST message later.
400px
In Admin --> Provisioning --> Phone Models create a Yealink profile and set the Remote provisioning POST message and details as shown:
Here is the example XML below:
<?xml version="1.0" encoding="UTF-8"?>
<methodCall>
   <methodName>redirect.registerDevice</methodName>
   <params>
      <param>
         <value>
            <string><![CDATA[{$mac}]]></string>
         </value>
      </param>
      <param>
         <value>
            <string><![CDATA[testName]]></string>
         </value>
      </param>
      <param>
         <value>
            <string><![CDATA[1]]></string>
         </value>
      </param>
   </params>
</methodCall>
400px
Content type must by application/json;charset=UTF-8
Current Verification
After applying the change, verify the related MiRTA PBX page, the Asterisk logs, and the relevant Status menu entry. Recheck tenant selection before testing tenant-specific behavior.
QueueMetrics integration
This page reorganizes the operational steps for QueueMetrics integration.
You should have received from QueueMetrics the Web interface and API credentials, something like:
QM-Live ID:    YourCompany
Access URL:    https://my.queuemetrics-live.com/YourCompany
Login:         demoadmin
Initial passw: 171432321

URI=https://my.queuemetrics-live.com/YourCompany
LOGIN=webqloader
PASS=171432321
TOKEN=
Now you should enable the QueueMetrics integration in the Admin/Settings page and set a delay. I suggest starting with 5 seconds (5000).
400px
Don't forget the URL to enter in the Queue Metrics section contains the full API URL, like
https://my.queuemetrics-live.com/YourCompany/jsonQLoaderApi.doYou need to enable a queue to use the QueueMetrics and at the same time to configure QueueMetrics to manage the data being sent.
In the queue of your choice, enable the QueueMetrics integration
400px
Take note of the Queue ID, on the link of the page. In this case, it is 340
400px
Now you can move in the QueueMetrics website and assign the ID of the queue to the Queue you want to monitor
Current Verification
After applying the change, verify the related MiRTA PBX page, the Asterisk logs, and the relevant Status menu entry. Recheck tenant selection before testing tenant-specific behavior.
Using PHP 7
This page reorganizes the operational steps for Using PHP 7.
Upgrade you PHP to php 7.3/7.4 by running:
On CentOS 6
wget http://rpms.famillecollet.com/enterprise/remi-release-6.rpm
rpm -Uvh remi-release-6.rpm
yum -y replace php-common --replace-with=php73-php-common
yum -y install php73-php-cli
yum -y install php73-php-pecl-http php73-php-pecl-http-devel
yum -y install php73-php-pecl-mysql php73-php
yum -y install php73-php-pecl-raphf php73-php-pear php73-php-ldap php73-php-cli php73-php-mysqlnd php73-php-xml php73-php-gd
yum -y install php73-php-pecl-mysql php73-php-pecl-http-devel php73-php-mbstring php73-php-process php73-php-pecl-http php73-php-json php73-php-pdo php73-php-pecl-mcrypt php73-php-pecl-zip php73-php-imap php73-php-pecl-imagick php73-php-gd
yum -y remove "php5*"
mv /etc/php.ini.rpmsave /etc/php.ini
mv /etc/opt/remi/php73/php.ini /etc/opt/remi/php73/php.ini.old
ln -s /etc/php.ini /etc/opt/remi/php73/php.ini
service httpd restart
cp /usr/local/src/ioncube/ioncube_loader_lin_7.3.so /usr/lib64/php/modules
\rm /usr/bin/php
ln -s /usr/bin/php73 /usr/bin/phpOn CentOS 7
wget http://rpms.famillecollet.com/enterprise/remi-release-7.rpm
rpm -Uvh remi-release-7.rpm
yum -y replace php-common --replace-with=php74-php-common
yum -y install php74-php-cli
yum -y install php74-php-pecl-http php74-php-pecl-http-devel
yum -y install php74-php-pecl-mysql php74-php
yum -y install php74-php-pecl-raphf php74-php-pear php74-php-ldap php74-php-cli php74-php-mysqlnd php74-php-xml php74-php-gd
yum -y install php74-php-pecl-mysql php74-php-pecl-http-devel php74-php-mbstring php74-php-process php74-php-pecl-http php74-php-json php74-php-pdo php74-php-pecl-mcrypt php74-php-pecl-zip php74-php-imap php74-php-pecl-imagick php74-php-gd
yum -y remove "php5*"
mv /etc/php.ini.rpmsave /etc/php.ini
mv /etc/opt/remi/php74/php.ini /etc/opt/remi/php74/php.ini.old
ln -s /etc/php.ini /etc/opt/remi/php74/php.ini
service httpd restart
cp /usr/local/src/ioncube/ioncube_loader_lin_7.4.so /usr/lib64/php/modules
\rm /usr/bin/php
ln -s /usr/bin/php74 /usr/bin/phpEdit /etc/opt/remi/php74/php.ini to include the ioncube loader
Current Verification
After applying the change, verify the related MiRTA PBX page, the Asterisk logs, and the relevant Status menu entry. Recheck tenant selection before testing tenant-specific behavior.
Upgrading Ioncube
This page reorganizes the operational steps for Upgrading Ioncube.
To upgrade Ioncube to latest version you need to start by identifying the php version you are running:
# php -v
PHP 5.5.38 (cli) (built: Jul 21 2016 12:51:12)
Copyright (c) 1997-2015 The PHP Group
Zend Engine v2.5.0, Copyright (c) 1998-2015 Zend Technologies
    with the ionCube PHP Loader (enabled) + Intrusion Protection from ioncube24.com (unconfigured) v5.0.20, Copyright (c) 2002-2016, by ionCube Ltd.
In this case, the PHP 5.5 is running with a IonCube 5.0.20. Please note you need at least version 10 to run the web interface. To upgrade
cd /usr/local/src
wget https://downloads.ioncube.com/loader_downloads/ioncube_loaders_lin_x86-64.tar.gz
tar xzvf ioncube_loaders_lin_x86-64.tar.gz
\cp ioncube/ioncube_loader_lin_5.5.so /usr/lib64/php/modules/
service httpd restart
In case you are running a different PHP version, you need to copy the correct ioncube version.
Current Verification
After applying the change, verify the related MiRTA PBX page, the Asterisk logs, and the relevant Status menu entry. Recheck tenant selection before testing tenant-specific behavior.
Upgrading CUPS to include ipp support
This page reorganizes the operational steps for Upgrading CUPS to include ipp support.
You can receive a FAX and have it directly printed to your printer using the IPP protocol.
To do so, besides the port forwarding to allow the PBX to reach directly the printer port, you need to install a Cups package containing the ipptool command. On CentOS 6, it can be done using the Cups packages available at
the PBX web address
For example you can run:
yum -y install the PBX web address the PBX web address the PBX web address the PBX web address
Current Verification
After applying the change, verify the related MiRTA PBX page, the Asterisk logs, and the relevant Status menu entry. Recheck tenant selection before testing tenant-specific behavior.
Using haproxy
This page reorganizes the operational steps for Using haproxy.
Haproxy can add a useful layer, allowing to balance and failover the connection between two mysql servers. This is a client provided configuration file:
<tt>
# pxdbproxy haproxy config
global
log 127.0.0.1 local2
chroot /var/lib/haproxy
pidfile /var/run/haproxy.pid
maxconn 4000
user haproxy
group haproxy
daemon
stats socket /var/lib/haproxy/stats
defaults
mode tcp
log global
option tcplog
option dontlognull
option logasap
option http-server-close
option redispatch
retries 3
timeout connect 1s
timeout client 10s
timeout server 10s
#
# BEGIN local mysql proxy definition
listen mysql-proxy
bind 127.0.0.1:3306
balance roundrobin
option httpchk
option tcpka
default-server port 3307 inter 2s downinter 5s rise 3 fall 2 slowstart 60s
server pbx-db01 172.24.9.99:3306 check
server pbx-db02 172.24.9.100:3306 check backup
timeout client 30m
timeout server 30m
</tt>
Current Verification
After applying the change, verify the related MiRTA PBX page, the Asterisk logs, and the relevant Status menu entry. Recheck tenant selection before testing tenant-specific behavior.
Configuring OpenDNS
This page reorganizes the operational steps for Configuring OpenDNS.
A good DNS service is extremely important. Asterisk can performs a lots of DNS requests and it can lock awaiting for an answer. It is strongly suggested to configure OpenDNS servers:
nameserver 208.67.222.222
nameserver 208.67.220.220
nameserver 208.67.222.220
nameserver 208.67.220.222
If your DNS configuration is managed by NetworkManager, edit your /etc/sysconfig/network-scripts/ifcfg...
DNS1=208.67.222.222
DNS2=208.67.220.220
DNS3=208.67.222.220
DNS4=208.67.220.222
If you are using CentOS 9 and derivative distributions, edit your /etc/NetworkManager/system-connections/...nmconnection
dns=208.67.222.222;208.67.220.220;208.67.222.220;208.67.220.222;OpenDNS is currently being blocking some countries, like France:
dig @208.67.222.222 www.mirtapbx.com +norecurse +comments

; <<>> DiG 9.11.4-P2-RedHat-9.11.4-26.P2.el7_9.16 <<>> @208.67.222.222 www.mirtapbx.com +norecurse +comments
; (1 server found)
;; global options: +cmd
;; Got answer:
;; ->>HEADER<<- opcode: QUERY, status: REFUSED, id: 10748
;; flags: qr ra; QUERY: 1, ANSWER: 0, AUTHORITY: 0, ADDITIONAL: 2

;; OPT PSEUDOSECTION:
; EDNS: version: 0, flags:; udp: 1410
; OPT=15: 00 10 ("..")
;; QUESTION SECTION:
;www.mirtapbx.com.              IN      A

;; ADDITIONAL SECTION:
www.mirtapbx.com.       0       IN      TXT     "The OpenDNS service is currently unavailable in France and some French territories due to a court order under Article L.333-10 of the French Sport Code. See https://support.opendns.com/hc/en-us"

;; Query time: 1 msec
;; SERVER: 208.67.222.222#53(208.67.222.222)
;; WHEN: lun mar 30 21:31:15 BST 2026
;; MSG SIZE  rcvd: 257
In this case, it can be worth using
Cloudflare DNS (1.1.1.1)
Google Public DNS (8.8.8.8)
Quad9 (9.9.9.9)
Current Verification
After applying the change, verify the related MiRTA PBX page, the Asterisk logs, and the relevant Status menu entry. Recheck tenant selection before testing tenant-specific behavior.
Configuring BLF on Cisco SPA
This page reorganizes the operational steps for Configuring BLF on Cisco SPA.
Cisco SPA can be tricky even for basic configurations. In this case, we use a Cisco SPA504G to configure BLF for some phones.
# Open the phone administration in your browser.
# Login as administrator and open advanced configuration.
# Select the "Attendant Console” screen.
It is important to set "Asterisk" for the server type:
400px
In the BLF key section, to monitor extension 104 in tenant DEVEL, use a string like:
fnc=blf+sd+cp;sub=104-DEVEL@$PROXY
For the direct pickup to work, you need to specify the feature code you have chosen in the "Attendant Console Call Pickup Code". Use something like *56# if you have specified *56[EXT] as Direct Pickup Code in MiRTA PBX
Current Verification
After applying the change, verify the related MiRTA PBX page, the Asterisk logs, and the relevant Status menu entry. Recheck tenant selection before testing tenant-specific behavior.
Using Cisco 7900/8800/9900 phones
This page reorganizes the operational steps for Using Cisco 7900/8800/9900 phones.
Standard asterisk support for these legacy phones is not complete, so it is needed to apply a series of patches:
http://usecallmanager.nz/sip-conf.html
Current Verification
After applying the change, verify the related MiRTA PBX page, the Asterisk logs, and the relevant Status menu entry. Recheck tenant selection before testing tenant-specific behavior.
Phones local dial plan
This page reorganizes the operational steps for Phones local dial plan.
Most if not any phone has a local dial plan, a way to filter what is entered in the keypad. They are used to speed up the dialing, placing the call when a complete number is dialed, saving the time to press the "dial" button, but most of the time, they are just annoying not letting us dial what we want. Here a small guide to setting up the correct dial plan for most phones
Grandstream
- x means any digit from 0-9
- X means any digit and any letter from 0-9 and A-Za-z
- + means repetition
- \ is escape character
{ x+\-X+ | \#x+\-X+ | x+ | \+x+ | *x+ | *xx*x+ }
Current Verification
After applying the change, verify the related MiRTA PBX page, the Asterisk logs, and the relevant Status menu entry. Recheck tenant selection before testing tenant-specific behavior.
Text to Speech and Speech to Text services with IBM Bluemix
This page reorganizes the operational steps for Text to Speech and Speech to Text services with IBM Bluemix.
Subscribe to IBM Bluemix and login to its web interface
http://www.ibm.com/cloud-computing/bluemix/Log in and create your space.
400px
From the catalog, select the Speech to Text and Text to Speech and create the service.
400px
Credentials are automatically created and ready to be used.
400px
Insert the credentials in the relative section in MiRTA PBX. You can find the Voice Synthesizer section in both Admin/Settings and Configuration/Settings
400px
Be sure to not mix username and password when entering credentials in MiRTA PBX
UPDATE
IBM changed their API authentication, so only the API KEY is provided. You need to enter "apikey" as username and the key provided as password
IBM has changed the interface so to go straight to the API KEY, got to https://cloud.ibm.com/resources, select the Speech to Text or Text to Speech service and then press on "Complete Details", then you can check the API credentials
You need to locate this page and get the credentials highlighted:
400px
ANOTHER UPDATE
IBM has announced it will discontinue the current hard coded endpoint stream.watsonplatform.net and request you to check your account for the correct endpoint to use:
The pattern for the new URLs is api.{location}.{offering}.watson.cloud.ibm.com
For details on how to find and update the URL, see "Update endpoint URLs from watsonplatform.net" here:
https://cloud.ibm.com/docs/watson?topic=watson-endpoint-change
Yet Another update
The discontinuation of the old API is now complete. You need to enter the full URL for the service in the endpoint field, like
for Speech to text:
https://api.us-east.speech-to-text.watson.cloud.ibm.com/instances/82baccdd-45ee-46ff-ba1a-3cd23425b3c1/v1/recognize
for Text to speech:
https://api.us-east.text-to-speech.watson.cloud.ibm.com/instances/7615166e-9aee-42db-71e8-52fd6fa50586f/v1/synthesize
Current Verification
After applying the change, verify the related MiRTA PBX page, the Asterisk logs, and the relevant Status menu entry. Recheck tenant selection before testing tenant-specific behavior.
Changing server name
This page reorganizes the operational steps for Changing server name.
If you like to change the server name, you need to perform additional activities to ensure all continue to work.
- Change the server name in /etc/sysconfig/network (assuming you are running CentOS)
- Change the direct IP resolving in /etc/hosts
- Change the label in /etc/asterisk/sip.conf
- Change the peername in Admin/PBX Nodes
- Change the sipregs_* in /etc/asterisk/extconfig.conf
- Reload asterisk
Current Verification
After applying the change, verify the related MiRTA PBX page, the Asterisk logs, and the relevant Status menu entry. Recheck tenant selection before testing tenant-specific behavior.
Changing server IP
This page reorganizes the operational steps for Changing server IP.
If you like to change the server IP, you need to perform additional activities to ensure all continue to work.
- Change the server IP in /etc/sysconfig/network-scripts/ifcfg-* ( if you are running an old CentOS) or in /etc/NetworkManager/system-connections/...nmconnection (if you are running a new CentOS Stream 9 or derivative OS)
- Change the direct IP resolving in /etc/hosts
- Change the peer IP in /etc/asterisk/sip.conf
- Change the allowed IP in /etc/asterisk/manager.conf
- Change the IP in /var/lib/asterisk/agi-bin/devstate.the related application page
- Change the IP in Admin/PBX Nodes
- Restart the server
If you are running asterisk behind NAT and you are going to just change the external IP Address, then it is only needed to change the external IP defined as externip in sip.conf and reload IP/restart the server
If you use separate databases, you may need to update the address for the database server. This is listed in the following files:
- /etc/odbc.ini
- /var/www/html/pbx/include/db.the related application page
- /var/lib/asterisk/agi-bin/include/db.the related application page
- /etc/voipmonitor.conf
If you are going to change the server name, be sure to update /etc/asterisk/extconfig.conf and the relevant part in Admin/PBX Nodes
Current Verification
After applying the change, verify the related MiRTA PBX page, the Asterisk logs, and the relevant Status menu entry. Recheck tenant selection before testing tenant-specific behavior.
Choosing between Host Based Routing and SIP Registration
This page reorganizes the operational steps for Choosing between Host Based Routing and SIP Registration.
MiRTA PBX doesn't support natively SIP registration for Providers, but you can manually configure them in sip.conf
Here a simple example about a static registration in sip.conf
[general]
...
register => 49088751:cyj74rrjd8gg@sip.flowroute.com
If you want, you can also define statically the SIP provider in sip.conf and then reference them in the Admin/Providers section. Doing a static configuration should be avoided because any change in the provider configuration will require a reload, but it can be needed if a parameter not yet supported by the web interface needs to be used.
[flowroute]
type=friend
secret=cyj74rrjd8gg
defaultuser=49088751
username=49088751
fromuser=49088751
host=sip.flowroute.com
dtmfmode=rfc2833
context=fromoutside
canreinvite=yes
allow=ulaw
allow=alaw
allow=gsm
insecure=port,invite
fromdomain=sip.flowroute.com
In the web interface, you'll reference the tag in square brackets [flowroute]
400px
Once sip.conf has been edited, to have it working, doing a sip reload is needed. Take in mind doing a sip reload will trash all clients registrations. Phones will be unavailable until new registration.
Before choosing to go with the SIP registration, please take the time to read
https://blog.flowroute.com/2014/07/09/sip-registration-vs-host-based-routing-which-side-wins/
Current Verification
After applying the change, verify the related MiRTA PBX page, the Asterisk logs, and the relevant Status menu entry. Recheck tenant selection before testing tenant-specific behavior.
Upgrading/Downgrading Asterisk
This page reorganizes the operational steps for Upgrading/Downgrading Asterisk.
Upgrading or downgrading Asterisk should be done only if really needed. Asterisk relies on a series of libraries and different Asterisk versions may need different library versions.
A simple script to upgrade Asterisk is provided as protected/installAsterisk.sh
To upgrade to latest version 20, you can just run
cp protected/installAsterisk.sh /usr/local/src
cd /usr/local/src
./installAsterisk 20-current
If you want to upgrade to a specific asterisk version, you can provide it as
./installAsterisk 20.12.0
Current Verification
After applying the change, verify the related MiRTA PBX page, the Asterisk logs, and the relevant Status menu entry. Recheck tenant selection before testing tenant-specific behavior.
Configuring BLF on a phone
This page reorganizes the operational steps for Configuring BLF on a phone.
If you want to monitor an extension status from another phone, you need to configure the phone for BLF. Based on the brand of phone, it is named in different ways, for example on Yealink the section is named "DSS Keys".
400px
The important thing to remember is the value to monitor will be the "username" of the phone, not just the number. So if you have extension 100 in tenant DEVEL, you need to monitor 100-DEVEL. You can check easily if the monitoring is correct using the command "asterisk -rx 'core show hints'"
# asterisk -rx 'core show hints'

    -= Registered Asterisk Dial Plan Hints =-
103-DEVEL@authentica: Custom:103-DEVEL      State:Idle            Presence:not_set         Watchers  1
104-DEVEL@authentica: Custom:104-DEVEL      State:Idle            Presence:not_set         Watchers  1
105-DEVEL@authentica: Custom:105-DEVEL      State:Idle            Presence:not_set         Watchers  1
50019-DEVEL@authenti: Custom:50019-DEVEL    State:Idle            Presence:not_set         Watchers  1
781-DEVEL@authentica: Custom:781-DEVEL      State:Idle            Presence:not_set         Watchers  1
_X.@authenticated   : Custom:${EXTEN}       State:Unavailable     Presence:                Watchers  0
----------------
- 6 hints registered
If you make a mistake and start to monitor something like '100DEVEL', without the dash, that will be a big problem because asterisk will refuse any other change in that extension to monitor. In other words, if you start monitoring 100DEVEL and then reconfigure the phone to monitor 100-DEVEL, asterisk will continue to monitor 100DEVEL... and that will not work. The only solution, in this case, is to restart asterisk.
There are some special extension to be monitored. You can monitor a queue for callers, monitoring the number associated to the queue with the tenant code, like 781-DEVEL.
Monitoring the voicemail
You can monitor a voicemail with a normal BLF button. You need to define a feature code to retrieve the voicemail, like *97[NUM] and then define *97 in Configuration/Settings, as "Enable Voicemail MWI with prefix:". So if the voicemail you want to monitor is 104 in tenant DEVEL, you can monitor *97104-DEVEL.
Using the voicemail button
Some phones have a voicemail button, so if you define the voicemail to monitor in the extension, the voicemail button will light up when there is a voicemail. The phone allows you to configure a special destination to dial when pressing it. If you have defined to retrieve the voicemail with the *97[NUM] prefix and your voicemail is the 104, you can configure *97104
Current Verification
After applying the change, verify the related MiRTA PBX page, the Asterisk logs, and the relevant Status menu entry. Recheck tenant selection before testing tenant-specific behavior.
Running on VMware
This page reorganizes the operational steps for Running on VMware.
Asterisk and MiRTA PBX work great in VMware, but you need to know running a "latency sensitive application" is not the same as running a web or email server. It is really important you are not overbooking the resources of your real servers, allocating more CPU or more Memory than the one really available in the physical system. It can be useful to read the following documentation from VMware
http://www.vmware.com/files/pdf/techpaper/latency-sensitive-perf-vsphere55.pdf
http://www.vmware.com/files/pdf/techpaper/VMW-Tuning-Latency-Sensitive-Workloads.pdf
One of the most common pitfall when running a PBX in a virtualized environment is to increase the number of CPU cores when the performance seems not enough. If there is an oversubscription of CPU in the VMware, it is possible to obtain the complete opposite effect, raising the number of CPU, lower the performance for the PBX. The reason can be counterintuitive, but it is clear when you understand how virtualization works. From
https://communities.vmware.com/servlet/JiveServlet/previewBody/21181-102-1-28328/vsphere-oversubscription-best-practices[1].pdf
"Whenever the virtual machine needs to perform an operation, it has to wait for a number of physical CPUs equal to the number of assigned vCPUs to be available. So, as administrators add more vCPUs to a virtual machine, there is an increased risk of poorer overall performance."
Let's make an example. You have a real server running VMware with 8 pCPU. You are running 4 virtual servers with just 1 vCPU and a PBX with 4 vCPU. All is going well, vCPU:pCPU is 1:1. You'd like to increase performance on the PBX, so you raise the vCPU to 8. Now you have an oversubscription of CPU. Every time the PBX wants to execute a single operation, it has to wait for 8 pCPU to be available. If only 4 pCPU are available because the other 4 virtual servers are busy performing their operations, it will be not able to run any instruction... only when all the virtual servers are quiet, doing nothing, not using the CPU, the PBX will be allowed to perform a single instruction, so your PBX performance with 8 vCPU will be worst than with 4 vCPU.
Current Verification
After applying the change, verify the related MiRTA PBX page, the Asterisk logs, and the relevant Status menu entry. Recheck tenant selection before testing tenant-specific behavior.
Upgrading kernel
This page reorganizes the operational steps for Upgrading kernel.
Upgrade Kernel
MiRTA PBX is used to run on CentOS 6, 7 and 9, 64bit.
Most modern servers have features that are working not optimal with the stock kernels. This is especially true for CentOS 6, having problems with large memory servers. To avoid these problems, it is possible to upgrade safely the servers to the latest stable Kernel 4.
Download the signature for repository Elrepo
rpm --import https://www.elrepo.org/RPM-GPG-KEY-elrepo.orgDownload the repo package:
For CentOS 6:
rpm -Uvh https://www.elrepo.org/elrepo-release-6-8.el6.elrepo.noarch.rpmFor CentOS 7:
rpm -Uvh https://www.elrepo.org/elrepo-release-7.0-3.el7.elrepo.noarch.rpmActivate the new repo "elrepo-kernel" and then install the kernel-lt and kernel-lt-devel
For CentOS 6, you need to edit the grub.conf and select the boot option for the new kernel
For CentOS 7, it is a bit tricky. First you need to identify the kernel menu entry:
Then edit the default menu entry and set the one identified above, like GRUB_DEFAULT=0
/etc/default/grub
Rebuild the grub configuration with
grub2-mkconfig -o /boot/grub2/grub.cfg
To temporarily try the kernel run the command
grub2-reboot <id>
Upgrading Kernel modules
If you are upgrading the kernel from 2.6 to 4.4, the GeoIP module requested is different. In this case, once the server restarts, the GeoIP module will fail to start and you may be locked out of your server. It can be a good idea to disable GeoIP support before performing the upgrade and then recompile the right module and then activate back GeoIP.
If you are moving from kernel 2.6 to 4.4, once running kernel 4.4 perform the following steps:
cd /usr/local/src
\rm -r xtables*
wget the PBX web address
tar xvf xtables-addons-2.10.tar.xz
cd xtables-addons-2.10
wget the PBX web address
mv mconfig_1.37 mconfig
./configure ; make ; make install
Dahdi module instead, is fully compatible between kernel versions
Updating Kernel modules
MiRTA PBX relies on two kernel modules, geoip and dahdi. The first allows to filter packets based on the geographical location, so you can avoid receiving call attempts from foreign countries, the second make conferences to work. When the kernel is upgraded, during a normal CentOS upgrade, these kernel modules will be not automatically regenerated for the new kernel. In this case, you need to reboot the server into new kernel and recompile both.
Recompiling dahdi
Dahdi installation directory is in /usr/local/src, so it will be enough to run:
<tt>
cd /usr/local/src/dahdi*
make
make install
service dahdi restart
</tt>
Latest CentOS 9 kernel can only run the latest dahdi from github
cd /usr/local/src/
git clone https://github.com/asterisk/dahdi-linux
cd dahdi-linux
make
make install
cd ..
cd /usr/local/src
git clone https://github.com/asterisk/dahdi-tools
cd dahdi-tools
autoreconf -i
./configure
make
make install
make config
/etc/init.d/dahdi restart
Recompiling geoip
GeoIP installation directory is in /usr/local/src, so it will be enough to run:
<tt>
cd /usr/local/src/xtables*
./configure
make
make install
</tt>
Problems with CentOS 9
The people at Redhat are doing an odd work, by merging changes from newer kernels into the 5.14.0 kernel used by CentOS 9 and derivatives. The result is dahdi is no longer able to compile successfully on some newer versions because the structure of the kernel source is changed, but the installation script still see it as 5.14.0.
For now these are the working tested kernels:
- 5.14.0-362
- 5.14.0-378
for now you can download the packages for 362 from
the PBX web address
Useful commands to list and change the default kernel:
grubby --info=ALL
grubby --set-default /boot/vmlinuz-5.14.0-362.18.1.el9_3.x86_64
Current Verification
After applying the change, verify the related MiRTA PBX page, the Asterisk logs, and the relevant Status menu entry. Recheck tenant selection before testing tenant-specific behavior.
Using Parking Lots
This page reorganizes the operational steps for Using Parking Lots.
Parking lots are a convenient way to put on hold or transfer calls from one extension to another one. They can be monitored using a BLF key.
Parking lots are defined as a range of extensions, by default from 700 to 720, reserved for transferring, holding and later retrieving of calls.
Due to a limitation in asterisk configuration, once parking lots are created, they cannot be changed without a module restart. You can restart the module using the “parking” icon in Admin/PBX Nodes. Due to this limitation, the definition of parking lots is reserved to admins when the tenant is defined. The tenant admin can define how long a call is held in a parking lot before returning to the parking extension, using the Configuration/Setting menu.
A call can be parked in several ways:
- by transfering the call to one of the parking lot extension, like it was an extension. If the transfer will be “blind”, parking lot number will not be played (but you know it because you dialed it).
- by using a feature code to “Park the call”, in this way the parking lot number will be played to the caller, if you blind transfer to the feature code, the parking lot number will not be played. You need to find another way to get the list of the parking lot where the call got parked.
- by using a feature code to “Park the call to [NUM]” and dialing the feature code along with the parking lot number, in this way the parking lot number will be played to the caller, if you blind transfer to the feature code, the parking lot number will not be played (but you know it because you dialed it).
A call can be retrieved by a parking lot by dialing the parking lot number
The list of parked calls can be retrieved using the feature code “Say the parked call extensions”
A parking lot can be monitored using BLF by using the parking lot number followed by “-” and the tenant code, like for monitoring parking lot 800 in the DEVEL tenant, use a BLF for 800-DEVEL.
When you park a call in a parking lot, by blind or attended transfer, the callerid of the call is saved in the parking lot. When the parking lot timeout, the parking phone will receive a call using that callerid. Not only, when retrieving a call from a parking lot, the phone can display the callerid of the parked call. To be able to see the callerid of the parked call, a small change is needed on the definition of the extension, enabling the “Trust RPID” setting and most important, allowing the processing of RPID info in the phone. For Yealink for example, it is needed to set the “Caller ID Source” to RPID-PAI-FROM.
Current Verification
After applying the change, verify the related MiRTA PBX page, the Asterisk logs, and the relevant Status menu entry. Recheck tenant selection before testing tenant-specific behavior.
Clustering and High Availability
This page reorganizes the operational steps for Clustering and High Availability.
Several MiRTA PBX are able to work in cooperative mode, building a cluster of servers, providing superior performance and high availability. MiRTA PBX cannot be used for load balancing without any external tool, but can be used for a load sharing cluster. The best way to setup the system is by using DNS SRV. DNS SRV is often referred as a way to provision high availabilty. It is a special DNS record listing all the servers providing a service. For each service offered a “priority” and “weight” are defined, so the load can be shared among several servers. A typical DNS SRV record has the following format (from Wikipedia)
_sip._udp.example.com. 86400 IN SRV 10 60 5060 bigbox.example.com.
_sip._udp.example.com. 86400 IN SRV 10 20 5060 smallbox1.example.com.
_sip._udp.example.com. 86400 IN SRV 10 10 5060 smallbox2.example.com.
_sip._udp.example.com. 86400 IN SRV 10 10 5066 smallbox2.example.com.
_sip._udp.example.com. 86400 IN SRV 20 0 5060 backupbox.example.com.
The first four records share a priority of 10, so the weight field's value will be used by clients to determine which server (host and port combination) to contact. The sum of all four values
is 100, so bigbox.example.com will be used 60% of the time. The two hosts smallbox1 and smallbox2 will be used for 20% of requests each, with half of the requests that are sent to smallbox2 (i.e. 10% of the total requests) going to port 5060 and the remaining half to port 5066. If bigbox is unavailable, these two remaining machines will share the load equally, since they will each be selected 50% of the time.
If all four servers with priority 10 are unavailable, the record with the next lowest priority value will be chosen, which is backupbox.example.com. This might be a machine in another physical location, presumably not vulnerable to anything that would cause the first four hosts to become unavailable.
The load balancing provided by SRV records is inherently limited, since the information is essentially static. Current load of servers is not taken into account.
Not only, but when a phone deregisters from one server to register on the other, there is a small delay and during such time the phone will be unavailable. Not only, but if the phone was in a call when the switch is performed, the phone status (INUSE) will be lost and another phone call may be received by the phone while still in use.
The most common setup for MiRTA PBX comprises two servers acting each one as asterisk, web and database server. A possible DNS SRV record for this setup can be the following:
_sip._udp.pbx.domain.com. 86400 IN SRV 10 10 5060 voip1.domain.com.
_sip._udp.pbx.domain.com. 86400 IN SRV 20 10 5060 voip2.domain.com.
In this way all the phone will register on voip1.domain.com and in case of any problem, the phone will move on voip2.domain.com. If a phone is registered on voip2 and a call arrives from voip1, the system will route the call accordingly and the client will not notice any difference. A tenant can have half the phones on a server and half on another server without noticing any difference. Even if this configuration is possible, it is not really advisable due to the additional load due to the routing of the calls between the servers. It can be good to work towards having all the phones for a tenant on the same server.
A more advanced setup will consist in creating two pools of servers as following:
_sip._udp.pbxA.domain.com. 86400 IN SRV 10 10 5060 voip1.domain.com.
_sip._udp.pbxA.domain.com. 86400 IN SRV 20 10 5060 voip2.domain.com.
_sip._udp.pbxB.domain.com. 86400 IN SRV 20 10 5060 voip1.domain.com.
_sip._udp.pbxB.domain.com. 86400 IN SRV 10 10 5060 voip2.domain.com.
The first pool, pbxA.domain.com will list voip1.domain.com as primary server and voip2.domain.com as secondary server. The second pool will list voip2.domain.com as primary and voip1.domain.com as secondary. All the phones using pbxA as DNS SRV address will normally connect to voip1. It is perfectly normal to find around 10% of the phones connected to the secondary server due to normal packet loss. All the phones using pbxB as DNS SRV address will use voip2.domin.com as primary. Carefully choosing which pool configure on tenant's phones, the load of the system can be effectively shared among multiple servers while providing resilience.
You can be tempted to create a single pool, listing all your servers, with the same priority/weight. In this way, the phones will randomly register on any of the servers listed. This will work, but there are few drawbacks. There will be a small delay when a phone moves from one server to the other. In this delay the phone can be unreachable to both servers. It depends on how the phone handles the hand over between the two servers when moving from one to the other. The other drawback affects call transfer. If the phone registers on server A and place a call and after few seconds move to server B, the user can put the first call on hold and start a new call, this time from server B. If the user asks to bridge the call together, making a transfer, it will fail because calls are on different servers.
Current Verification
After applying the change, verify the related MiRTA PBX page, the Asterisk logs, and the relevant Status menu entry. Recheck tenant selection before testing tenant-specific behavior.
Configuring Yealink to receive the number from the parked call
This page reorganizes the operational steps for Configuring Yealink to receive the number from the parked call.
CallerID can be sent from the server to the phone in several ways and with several formats. The options available are:
- FROM field
- PAI
- Remote Party ID
This last one is the most used one and the one offering the best integration between devices. When an extension has been configured with "Trust RPID", it is possible to receive the callerID of the phone connected. This is especially important when a call is pickup from the Parking Lot.
Due to the different protocol available, it is important to configure also the phone to pickup the correct one. For example, using RPID-PAI-FROM from the Advanced menu.
400px
Current Verification
After applying the change, verify the related MiRTA PBX page, the Asterisk logs, and the relevant Status menu entry. Recheck tenant selection before testing tenant-specific behavior.
Configuring Zoiper to use chat
This page reorganizes the operational steps for Configuring Zoiper to use chat.
Unfortunately latest Zoiper version uses some additional SIP message formats breaking the compatibility with Asterisk
Zoiper is a common and stable SIP client available for multiple platform, including Windows. It has a nice chat feature using SIP SIMPLE protocol, supported by Asterisk and MiRTA PBX. Using the SIP SIMPLE protocol you can exchange messages with almost all kind of desktop and soft phones, like they were SMS. Configuring Zoiper to use that requires few extra steps.
Start by configuring an account on Zoiper. All other options are default.
400px
To be able to chat with an extension, this one needs to be configured in the contacts and available
400px
The extension needs to be configured for presence as following
400px
Current Verification
After applying the change, verify the related MiRTA PBX page, the Asterisk logs, and the relevant Status menu entry. Recheck tenant selection before testing tenant-specific behavior.
Changing the clock source
This page reorganizes the operational steps for Changing the clock source.
Selecting the best clock source can improve call quality, especially for conferences where the clock source is really important.
You can check which clock source is used by your system:
cat /sys/devices/system/clocksource/clocksource0/current_clocksource
You can list the available clock sources for your system:
cat /sys/devices/system/clocksource/clocksource0/available_clocksource
You can change the clock source temporarly, until next reboot. Here as example, acpi_pm is selected
echo "acpi_pm" > /sys/devices/system/clocksource/clocksource0/current_clocksource
If you need to permanent change the clock source, you need to edit /etc/grub.conf
title CentOS (3.4.53-8.el6.centos.alt.x86_64)
root (hd0,1)
kernel /vmlinuz-3.4.53-8.el6.centos.alt.x86_64 ro root=/dev/md2 rd_NO_LUKS rd_NO_DM nomodeset crashkernel=auto SYSFONT=latarcyrheb-sun16 LANG=en_US.UTF-8 KEYTABLE=de clocksource=acpi_pm
initrd /initramfs-3.4.53-8.el6.centos.alt.x86_64.img
An overview on hardware clock and system timer circuits
When it comes to talk about a system's clock, the hardware sits at the very bottom. Every typical system has several devices, usually implemented by clock chips, that provide timing features and can serve as clocks. So, which hardware is available depends on the particular architecture. The clock circuits are used both to keep track of the current time of the day and to make precise time measurements. The timer circuits are programmed by the kernel, so they issue interrupts at a fixed, and predefined, frequency. For instance, IA-32 and AMD64 systems have at least one programmable interrupt timer (PIT) as a classical timer circuit, which is usually implemented by an 8254 CMOS chip. Let's briefly describe the clock and timer circuits that are usually found with any nearly modern system of those architectures:
Real Time Clock (RTC)
The RTC is independent of the system's CPU and any other chips. As it is energized by a small battery, it continues to tick even when the system is switched off. The RTC is capable of issuing interrupts at frequencies ranging between 2 Hz and 8,192 Hz. Linux uses the RTC only to derive the time and date at boot time.
Programmable Interrupt Timer (PIT)
The PIT is a time-measuring device that can be compared to the alarm clock of a microwave oven: it makes the user aware that the cooking time interval has elapsed. Instead of ringing a bell, the PIT issues a special interrupt called timer interrupt, which notifies the kernel that one more time interval has elapsed. As the time goes by, the PIT goes on issuing interrupts forever at some fixed (architecture-specific) frequency established by the kernel.
Time Stamp Counter (TSC)
All 80x86 microprocessors include a CLK input pin, which receives the clock signal of an external oscillator. Starting with the Pentium, 80x86 microprocessors sport a counter that is increased at each clock signal, and is accessible through the TSC register which can be read by means of the rdtsc assembly instruction. When using this register the kernel has to take into consideration the frequency of the clock signal: if, for instance, the clock ticks at 1 GHz, the TSC is increased once every nanosecond. Linux may take advantage of this register to get much more accurate time measurements.
CPU Local Timer
The Local APIC (Advanced Programmable Interrupt Controller) present in recent 80x86 microprocessors provide yet another time measuring device, and it is a device, similar to the PIT, which can issue one-shot or periodic interrupts. There are, however, a few differences:
- The APIC's timer counter is 32 bit long, while the PIT's timer counter is 16 bit long;
- The local APIC timer sends interrupts only to its processor, while the PIT raises a global interrupt, which may be handled by any CPU in the system;
- The APIC's timer is based on the bus clock signal, and it can be programmed in such way to decrease the timer counter every 1, 2, 4, 8, 16, 32, 64, or 128 bus clock signals. Conversely, the PIT, which makes use of its own clock signals, can be programmed in a more flexible way.
High Precision Event Timer (HPET)
The HPET is a timer chip that in some future time is expected to completely replace the PIT. It provides a number of hardware timers that can be exploited by the kernel. Basically the chip includes up to eight 32 bit or 64 bit independent counters. Each counter is driven by its own clock signal, whose frequency must be at least 10 MHz; therefore the counter is increased at least once in 100 nanoseconds. Any counter is associated with at most 32 timers, each of which composed by a comparator and a match register. The HPET registers allow the kernel to read and write the values of the counters and of the match registers, to program one-shot interrupts, and to enable or disable periodic interrupts on the timers that support them.
ACPI Power Management Timer (ACPI PMT)
The ACPI PMT is another clock device included in almost all ACPI-based motherboards. Its clock signal has a fixed frequency of roughly 3.58 MHz. The device is a simple counter increased at each clock tick. However the ACPI PMT is preferable to the TSC if the operating system or the BIOS may dynamically lower the CPU's frequency or voltage. When this happens, TSC's frequency changes causing time warps and others side-effects, while the frequency of ACPI PMT does not.
Current Verification
After applying the change, verify the related MiRTA PBX page, the Asterisk logs, and the relevant Status menu entry. Recheck tenant selection before testing tenant-specific behavior.
Configuring Google Drive as Recording Storage
You can use Google Drive as a Recording Storage only inside a Shared Drive created in Google Workplace. A normal, personal, GMail account cannot use the Google Drive as Recording Storage.
Access the Google Cloud Console
Access your Gmail account then connect to https://console.cloud.google.com/
Create or select a project. Do not chose "My First Project", but create a new project if needed. The "My First Project" has several limitation.
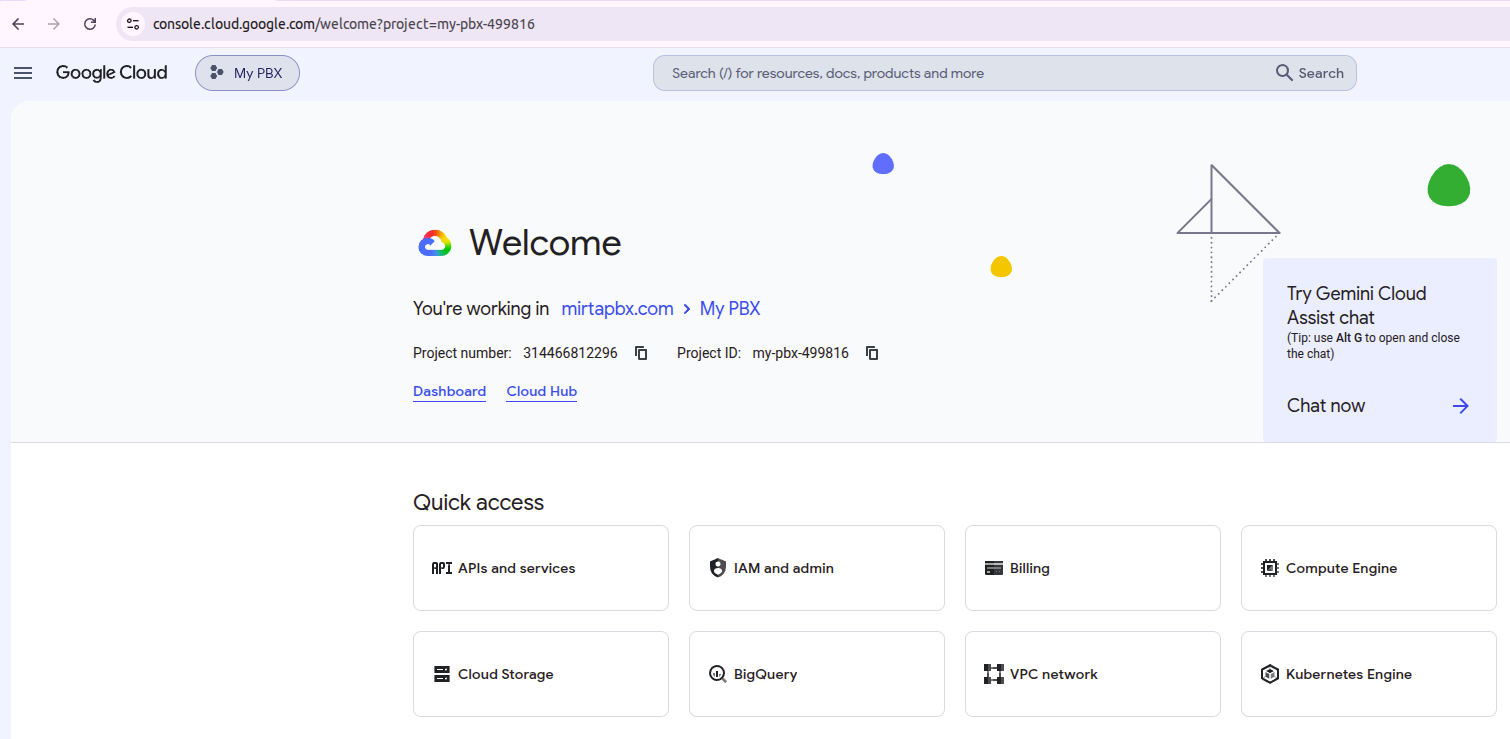
Create a Service Account by going in the Service accounts section
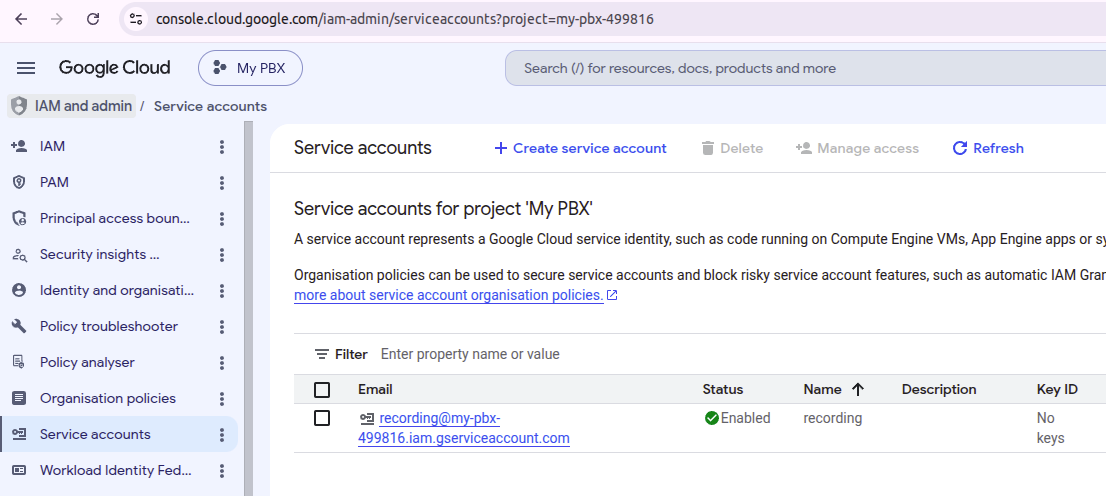
Choose Manage keys from the three doc Actions Menu on the right. Create a new JSON key and store it safely.
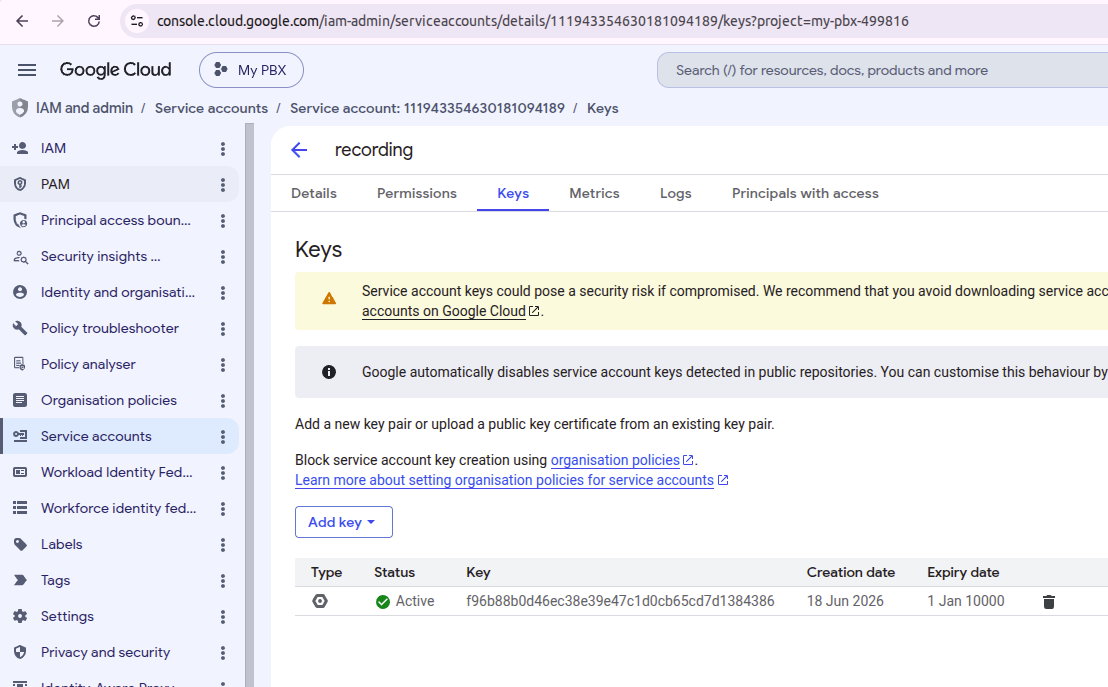
Using the private key
Now you have the private key saved to your computer
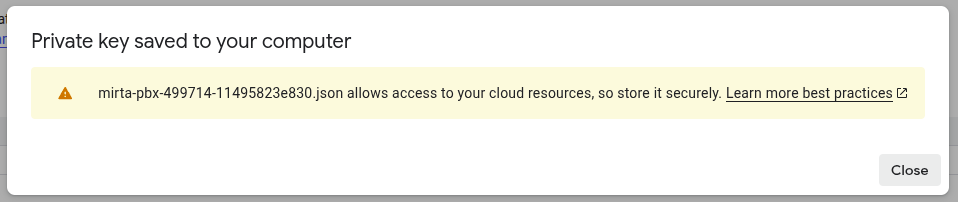
The private key will be downloaded once to your computer and cannot be downloaded again. It needs to be regenerated if lost.
Enable API access
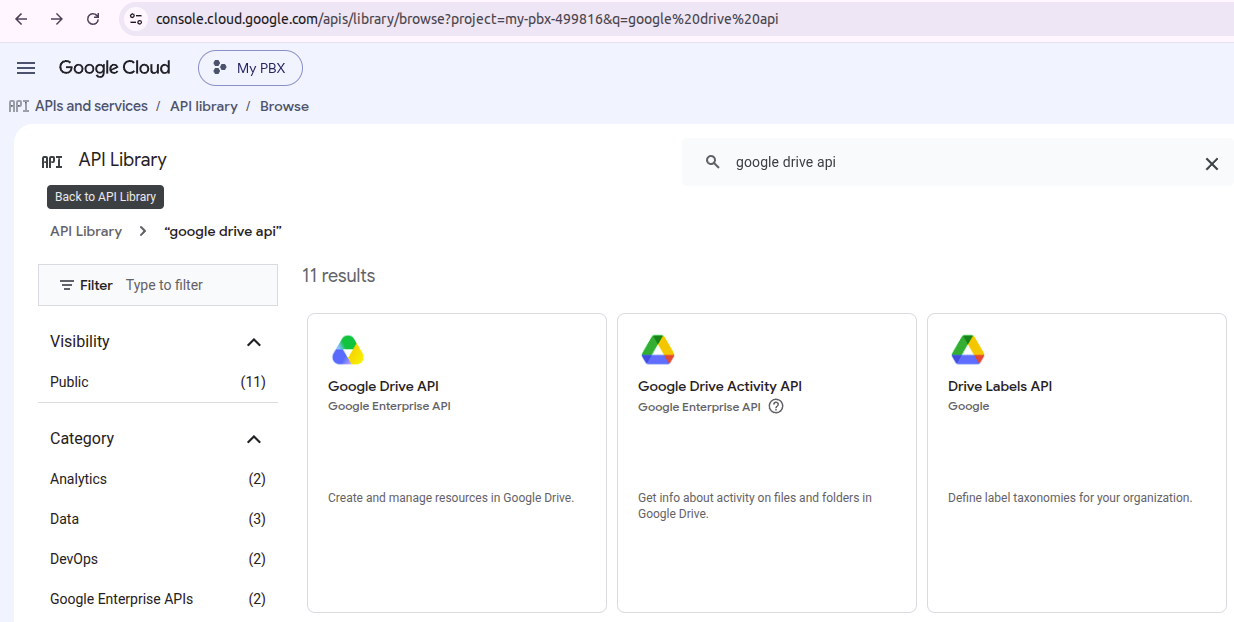
Create the shared Drive
In the Gmail account, create a Shared Drive.
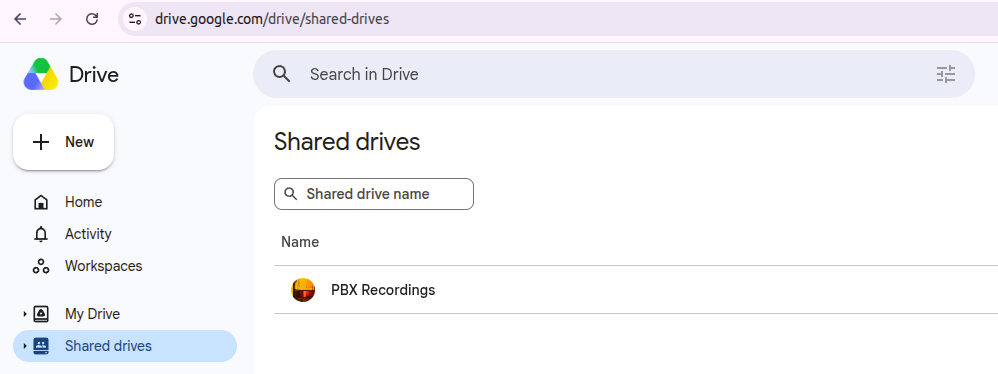
https://drive.google.com/drive/folders/0ADYbcKYesgiXUk9PVA
Take note of the shared drive ID by accessing it and looking at the address bar. For this folder the shared directory ID is 0ADYbcKYesgiXUk9PVA
Share the shared drive with the service account you have created
You can find the service account email inside the JSON key downloaded
"client_email": "recording@my-pbx-499816.iam.gserviceaccount.com"
Configure the data in the MIRTA PBX
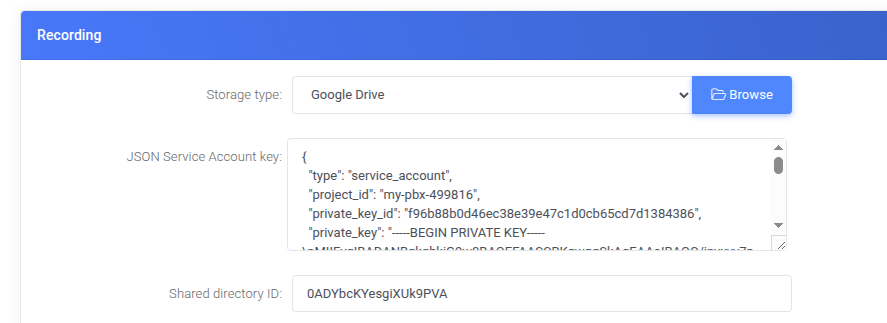
Dealing with Amazon AWS DNS limits
In a client configuration I noticed he was using 127.0.0.1 as DNS in /etc/resolv.conf and asked about an explaination. This is his answer:
The 127.0.0.1 loopback configuration is intentional. We were experiencing intermittent issues because Asterisk relies so heavily on DNS. AWS enforces a strict, unmodifiable hard limit of 1,024 Packets Per Second (PPS) per network interface to their default VPC resolver (172.31.0.2). Because of Asterisk's high query volume and the internal search paths, we were constantly exceeding this threshold.
When this limit is breached, AWS silently drops the packets at the hypervisor level. Before making the change, I checked the internal network interface statistics, and the linklocal_allowance_exceeded counter had already reached 62,661 dropped packets.
To resolve this permanently and prevent these drops, I did the following:
Installed DnsMasq: It now acts as a local DNS cache on 127.0.0.1, absorbing repetitive queries so they don't count toward the AWS network limit.
Configured Upstream Servers: For cache misses, DnsMasq safely forwards requests to a mix of the local VPC resolver, Cloudflare, and Google (172.31.0.2, 1.1.1.1, and 8.8.8.8).
Locked NetworkManager: Configured dns=none so NetworkManager doesn't overwrite /etc/resolv.conf on reboot.